Hi Guys,
In the last tutorial, I have given an overview of postman’s some features. Whereas in this tutorial “Use Postman like a PRO – Setting Up the workspace” We will set up our own environment which will be used for the rest of the series.
Create Workspace
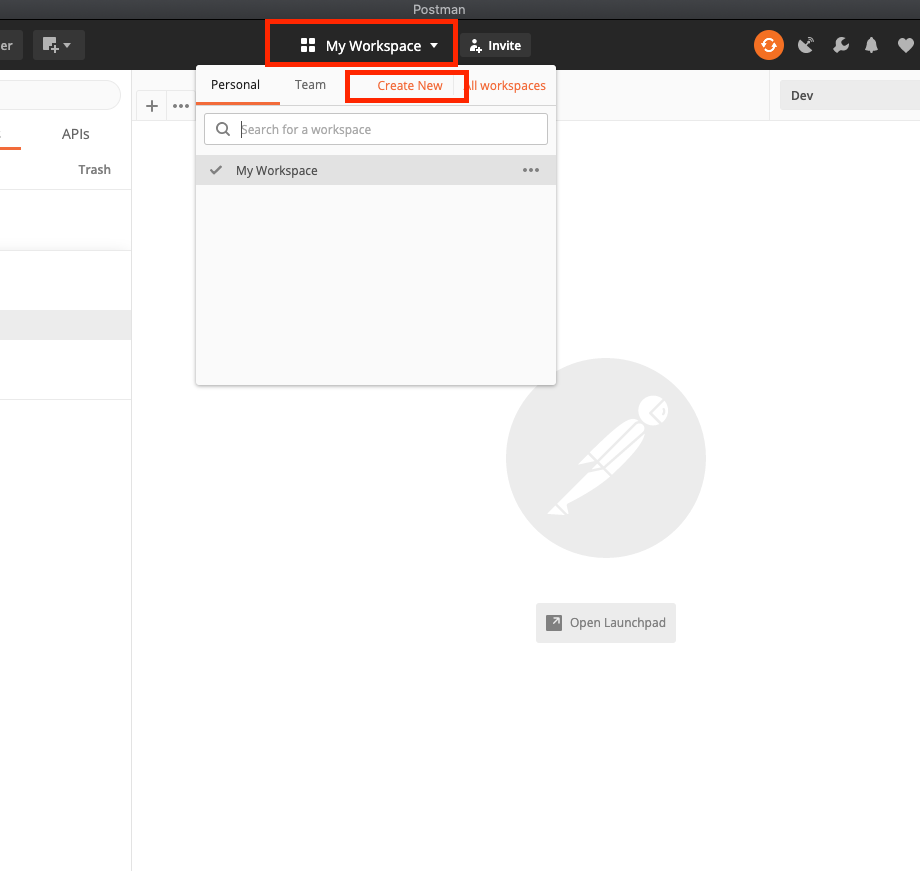
Postman by default creates a workspace for us named “My Workspace“. To create our own workspace we need to click on top center “My Workspace” button and then it will open a new small popup and then click on “Create New“. As showing in the below screenshot
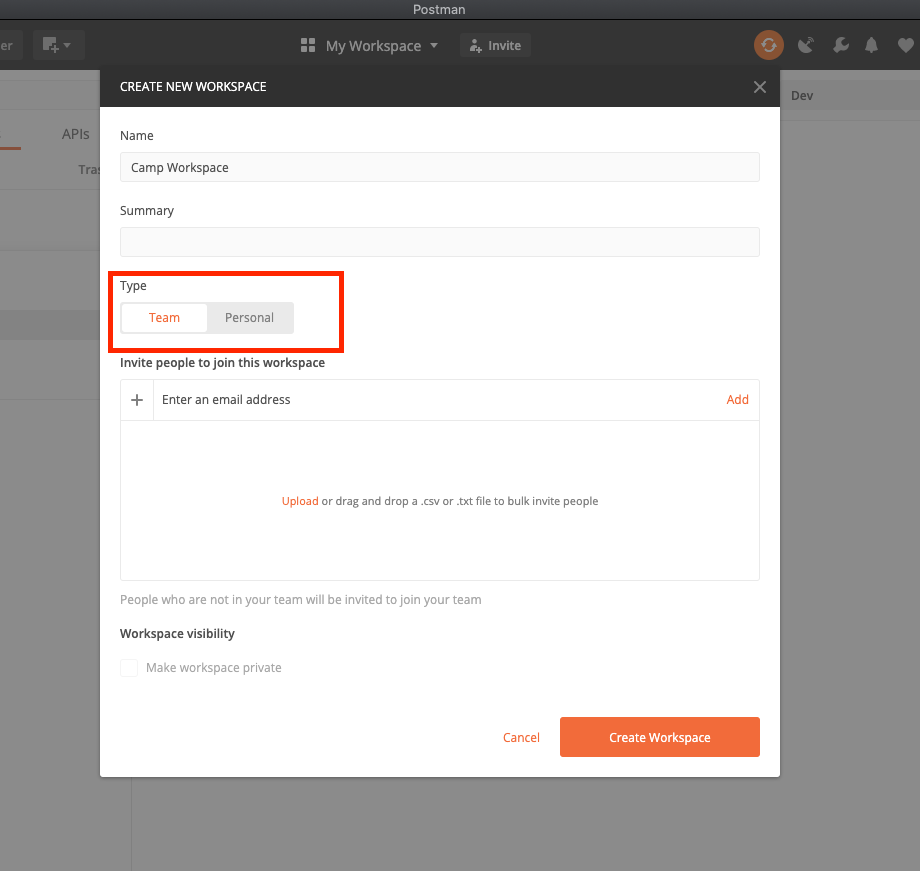
Then a new popup will appear and it will show the following options. Where you need to enter your new workspace name, summary (Optional) and select type
Type Supports two options:
1. Team
2. Personal
If you choose the team type then you have to enter the email addresses of your team members and clicking on the add button will send an invite link to the provided email addresses.
For the sake of simplicity, I am using personal and then click on the “Create Workspace” button.
Please refer the below screenshot for better understanding
Create Collection
We have successfully created our workspace now let’s move on to create a collection. In the left corner you can see a “Create Collection” button, click on that and a popup will appear with some options.
Name – Need to enter collection Name
Description – Here, You can specify what kind of request it will contain or something else. Although this field is optional.
Authorization – You can select the access tokens which will be applicable for every request present in the collection. Although you can override the authorization option for the specific request later.
Let’s understand this with an example. Suppose in this collection you will group all those API’s which will be called after login. In login, you will receive the access token and that access token will be required for all the other APIs. So at the time of creating the collection, you can simply select the authorization and that will be available all the requests.
Rest of the options are already explained in the previous tutorial
For now, I am not using any of the options here and simply creating the collection.
Create Folders
Now we have successfully created our collection. Right-click on your newly created collection. and select the fifth option “Add Folder“. Name the folder and press the “Create” button.
Create Request
Now we have almost set up our environment. Let’s create our first API request. Right-click on your new folder and click on “Add Request“. A popup will appear and enter the details which are self-explanatory and click on the Save button. By default, the postman creates a GET request. Now select the request and on the right pane, Your request will be opened with multiple options.
For now, Simply use following URL
https://jsonplaceholder.typicode.com/todos/1
and click on the “Send” button. Please refer the attached screenshot
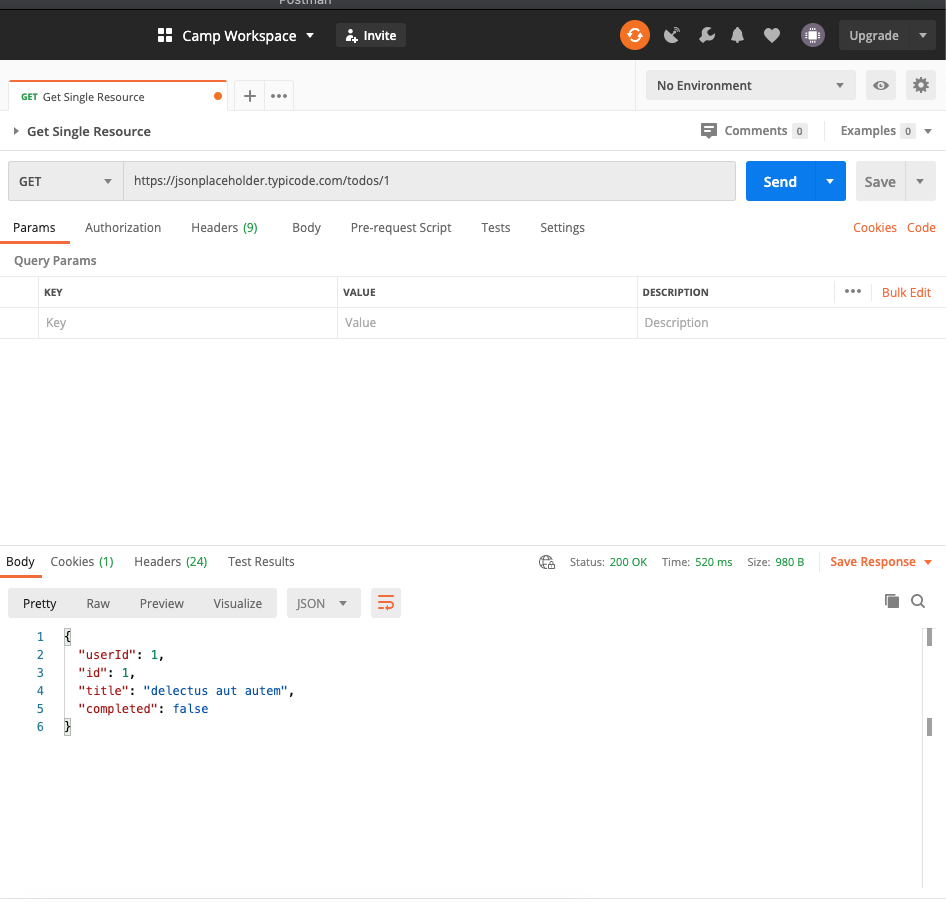
Here you will observe a few important things
Body – It shows the response
Cookies – It shows the cookie send by the server
Headers – It shows the response headers
Status – It shows the HTTP response codes. 200 means request was successfully executed. There are various HTTP codes are available
Size – It shows the request and response payload size which includes two things (Body + headers)
Thanks for reading